
Persona Step Libraries in Serenity BDD
Serenity 1.6.3 comes with a new step library feature called Persona Step Libraries. Persona Step Libraries help you make your test code more intuitive and more readable. You can check out the full release announcement on our new Rocket Chat forum.
Serenity has always tried to make it easy to organise your test code into appropriate layers and reusable components. Step Libraries are one way it does this. Step Libraries let you layer your code into reusable business tasks, and hide the detailed interaction code (interacting with page objects or REST APIs, for example) away from the test logic. This makes the code both easier to reuse and easier to maintain.
But it can sometimes be hard to know how to organise your step libraries. For example, you can place all the methods associated with a particular user type in one step library. But this can lead to large, bloated step libraries that are hard to understand.
Persona thinking

We have found that a cleaner approach is to organise step libraries into slices of behaviour. For example, think of a client creating a new account, a client purchasing a book, or an administrator handling a refund. This keeps the libraries small and focused. And if your tests are aligned to specific slices of behaviour (as good tests tend to be), there won't be too much overlap either.
Persona Step Libraries
In Serenity 1.6.3, you can use your step libraries to represent persona or actors in your tests. You can even give them names, with names that will appear in the reports. For example, suppose we were testing a Frequent Flyer application. We might have a slice of behaviour about a traveller who earns status points. Our first test might look like this:
@RunWith(SerenityRunner.class)
public class WhenEarningFrequentFlyerStatus {
    @Steps
    TravellerEarningStatusPoints tracy;

    @Test
    public void members_should_start_with_Bronze_status() {
        // GIVEN
        tracy.joins_the_frequent_flyer_program();

        // THEN
        tracy.should_have_a_status_of(Bronze);
    }
}
The TravellerEarningStatusPoints step definition class looks like this:
public class TravellerEarningStatusPoints {

    private String actor;

    private FrequentFlyer frequentFlyer;

    @Step("#actor joins the frequent flyer program")
    public void joins_the_frequent_flyer_program() {
        frequentFlyer = FrequentFlyer.withInitialBalanceOf(0);
    }
}
Notice how we have an actor field. This field will be instantiated with the name of the step library variable (in this case, "Tracy"). Then we can refer to the actor's name in the step description:
    @Step("#actor joins the frequent flyer program")
    public void joins_the_frequent_flyer_program() {
        frequentFlyer = FrequentFlyer.withInitialBalanceOf(0);
    }
When we run these tests, Tracy's name will appear as part of the step descriptions in the reports:
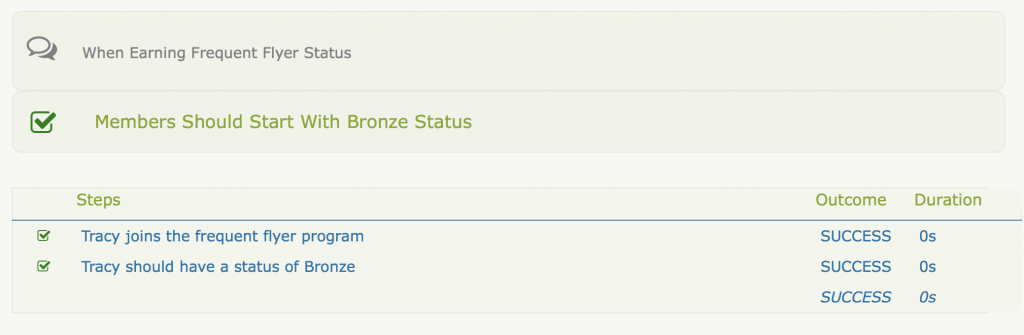
Now the name of each persona appears in the text of the reports, making them that bit more readable and more relatable.
Related courses and workshops

If you want to learn more about Serenity BDD, take a look at the Serenity Dojo online training programme. The Serenity Dojo Online Training Programme is an innovative and exciting way of learning good BDD and Test Automation practices, including Cucumber, Selenium WebDriver, and Serenity BDD, and also the advanced Java development skills you need to be a great test automation specialist.