
Serenity BDD and JIRA – a 5 minute primer
Serenity BDD provides a number of ways you can integrate your acceptance tests with JIRA. In this article, we look at a few of the more common ones, focusing on integration with Serenity BDD and Cucumber.
Adding links to JIRA in your Serenity reports
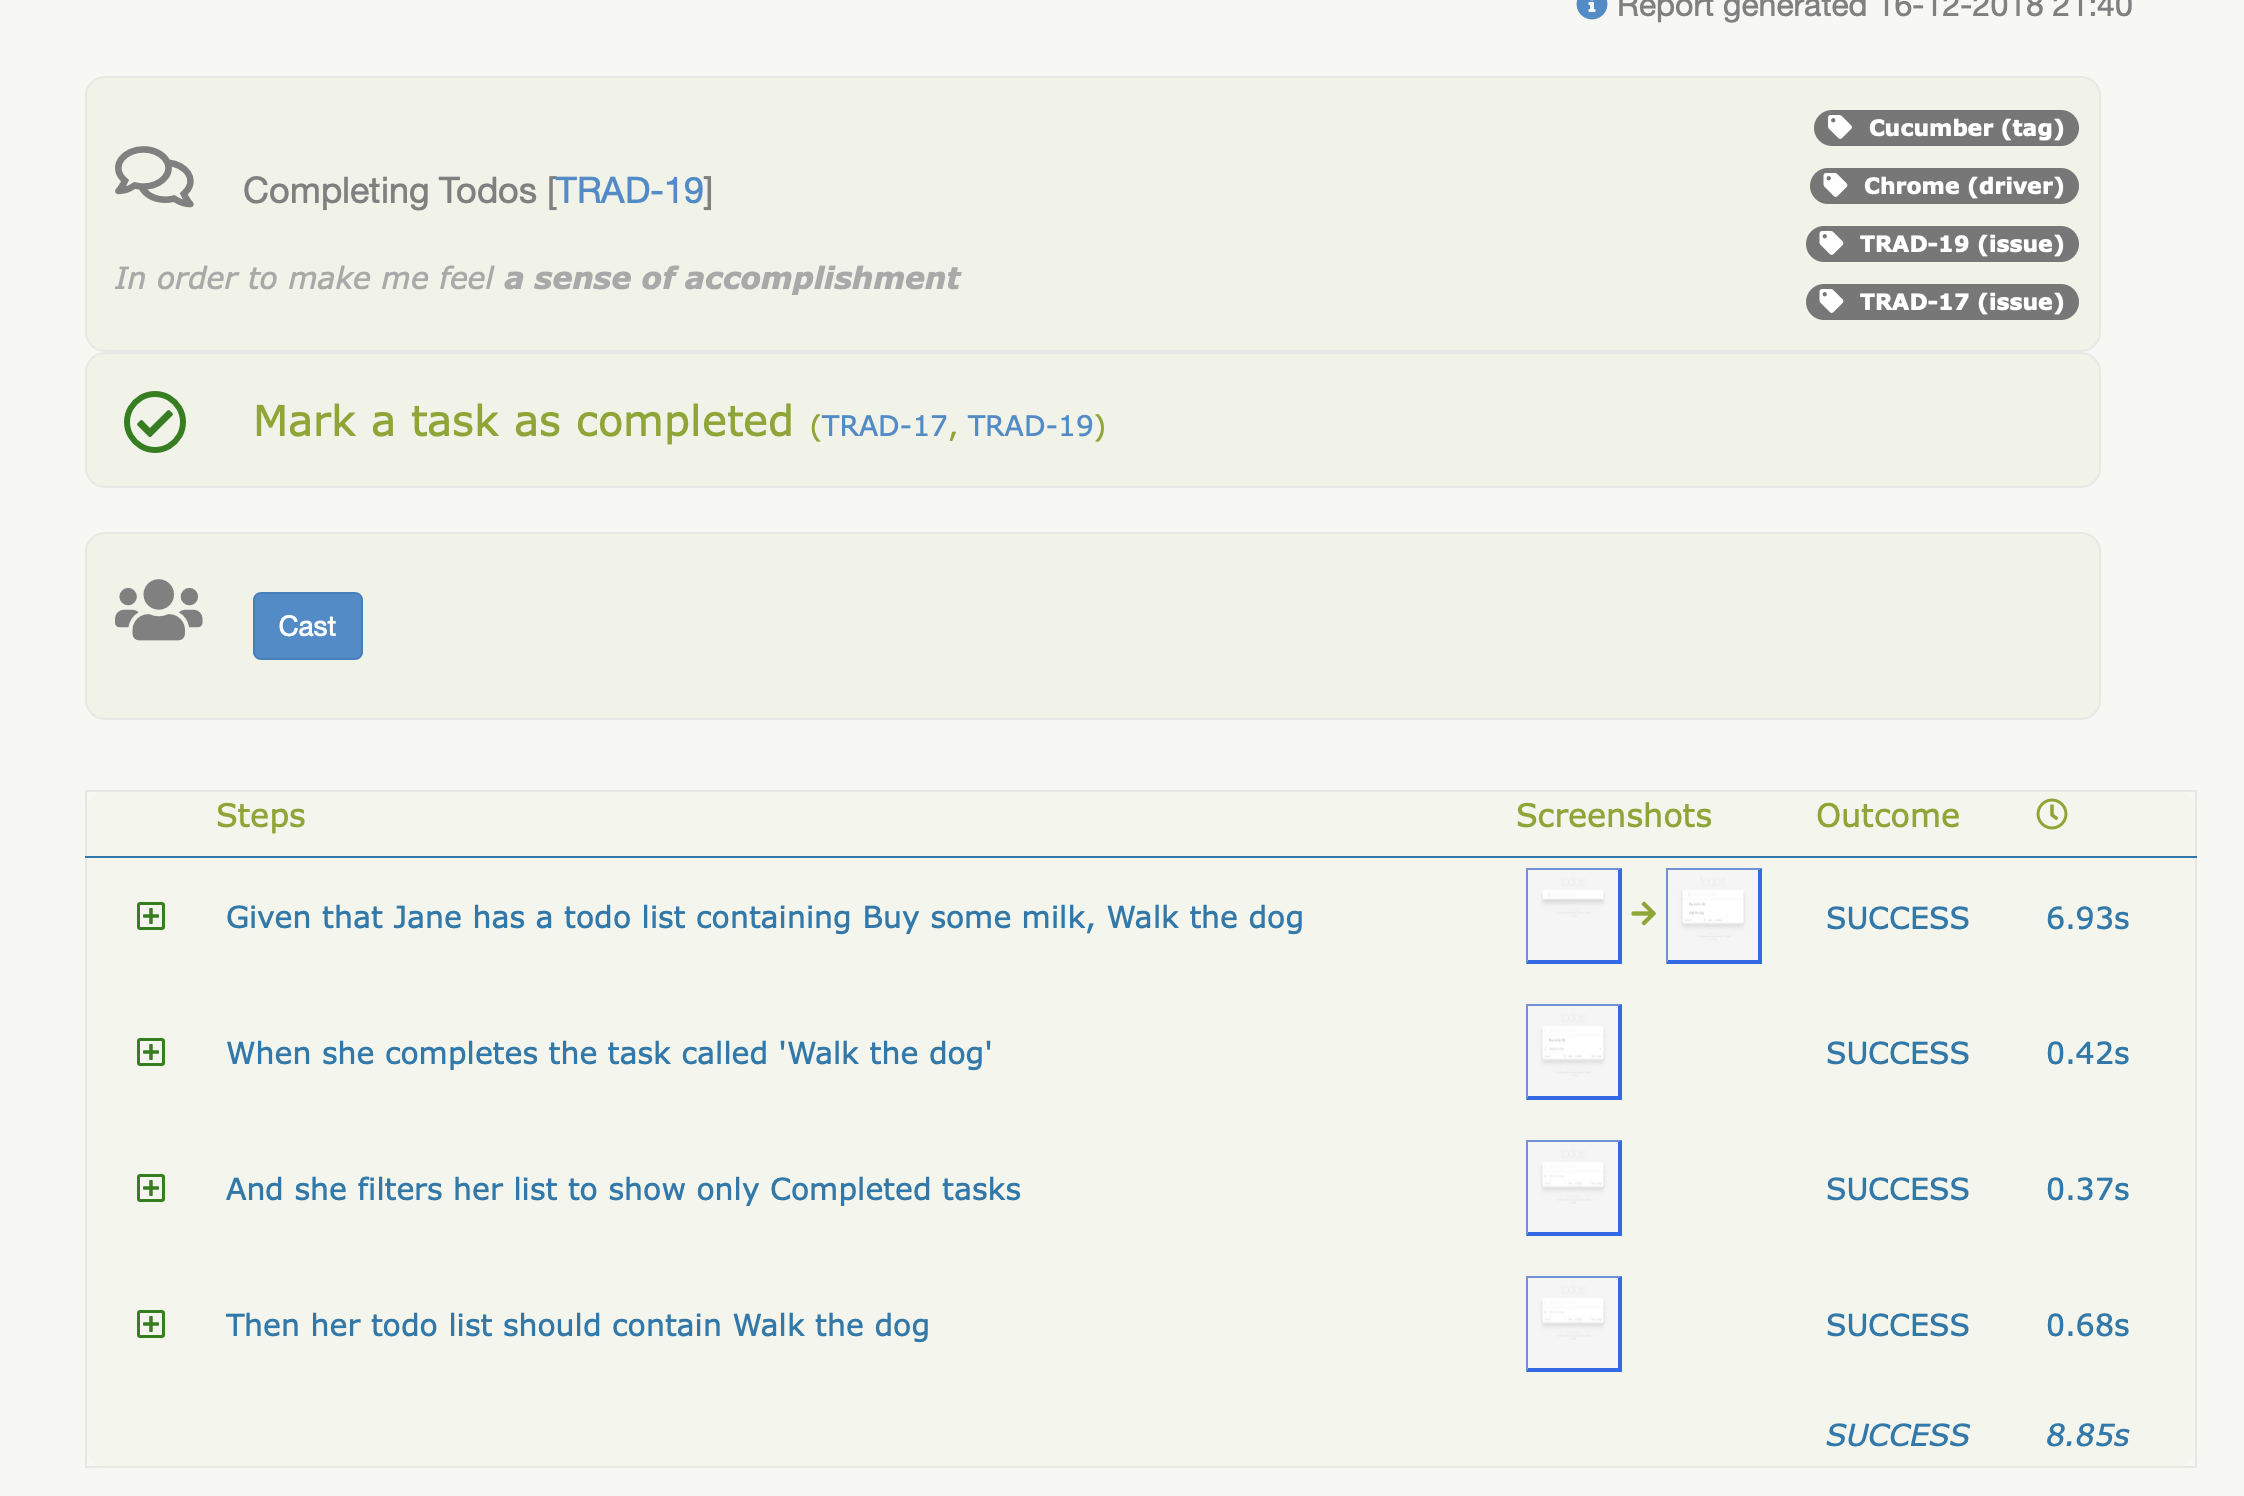
The first and easiest integration with JIRA is to get Serenity to include links to JIRA tickets in your Serenity reports. You can do this simply by adding @issue tags to your scenarios or features. You can place @issue tags either at a feature level (in which case they will apply to all the scenarios in the feature), or associate them with individual stories. Both techniques can be seen in the following feature:
@issue:TRAD-19
Feature: Completing todos

  In order to make me feel **a sense of accomplishment**
  As a forgetful person
  I want to be to _view all of things I have completed_

  @issue:TRAD-17
  Scenario: Mark a task as completed
    Given that Jane has a todo list containing Buy some milk, Walk the dog
    When she completes the task called 'Walk the dog'
    And she filters her list to show only Completed tasks
    Then her todo list should contain Walk the dog

  Scenario: List of completed items should be empty if nothing has been completed
    Given that Jane has a todo list containing Buy some milk, Walk the dog
    When she filters her list to show only Completed tasks
    Then her todo list should be empty
To include JIRA links in your Serenity reports, you need to set the jira.url property in your serenity.properties file to the base URL for your JIRA server:
jira.url=https://my.jira.serverYou also need to add the serenity-jira-plugin dependency to your project, e.g. (in Maven):
<dependency>
    <groupId>net.serenity-bdd</groupId>
    <artifactId>serenity-jira-plugin</artifactId>
    <version>1.11.0</version>
</dependency>
When you run your tests, Serenity will include links to JIRA at both the Feature and the scenario level, as you can see in the following report:
Two-way links
You can also tell Serenity to add a comment in the JIRA issue containing the latest test result, and a link to the Serenity report. To make this work, you need to give Serenity some login details - you can put these in your serenity.properties file, or pass them in on the command line in your CI build. You also need to give a publically-accessible URL where the full Serenity report can be accessed. Again, this is best done on the command line in the CI server, unless you only want to refer to the latest Serenity report.
jira.username=scott
jira.password=tiger
serenity.public.url=http://buildserver.myorg.com/serenity/report/101
With this configuration, Serenity will add a comment like the following to the relevant JIRA cards:
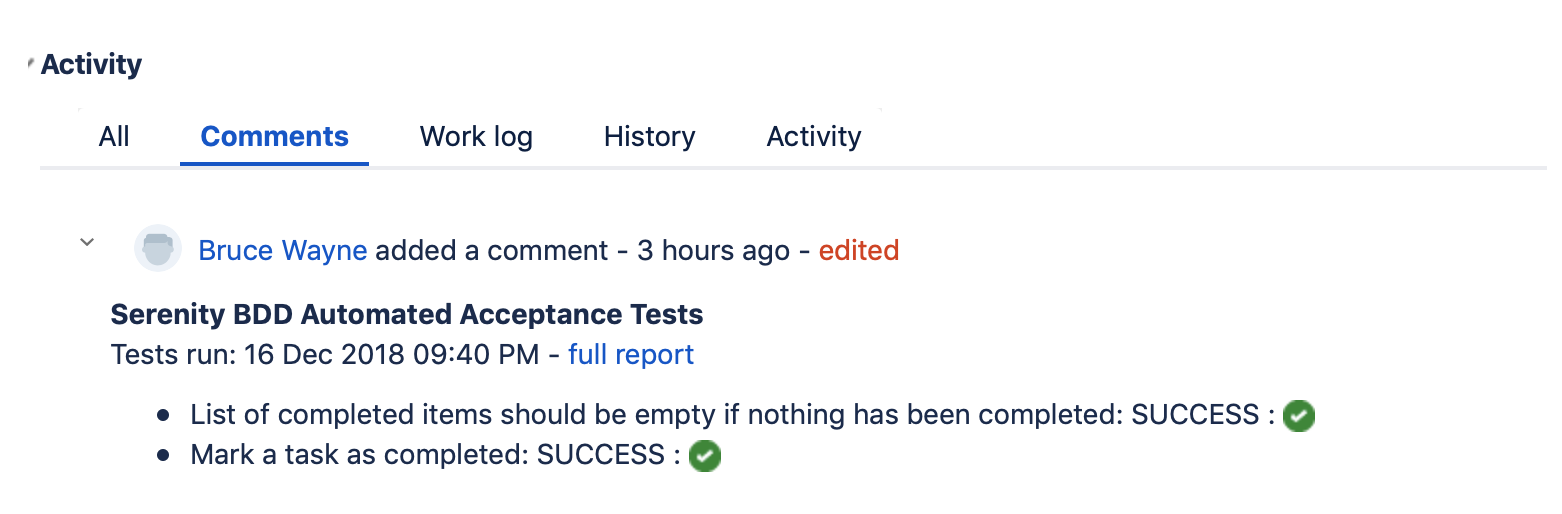
By default, Serenity will replace any existing Serenity comments with the latest results. If you would prefer a new comment for each test run, you can set the serenity.jira.always.create.new.comment property to true.
Sometimes, you may want to skip updates entirely for a given build. In this case, set serenity.skip.jira.updates to true.
Updating Card status in JIRA
You may also want to update the status of your JIRA cards, based on the outcomes of your Serenity tests. For example, if a Reopened card passes all the acceptance criteria, if should trigger a Resolve Issue event and update the card status to Resolved.
Note: this configuration needs a fairly mature CI/DevOps setup, and a reliable test suite, otherwise you may end up with a lot of notification messages.
The Serenity JIRA workflow configuration builds on the JIRA concept of states and events; the default JIRA workflow looks something like this, but it is highly configurable:
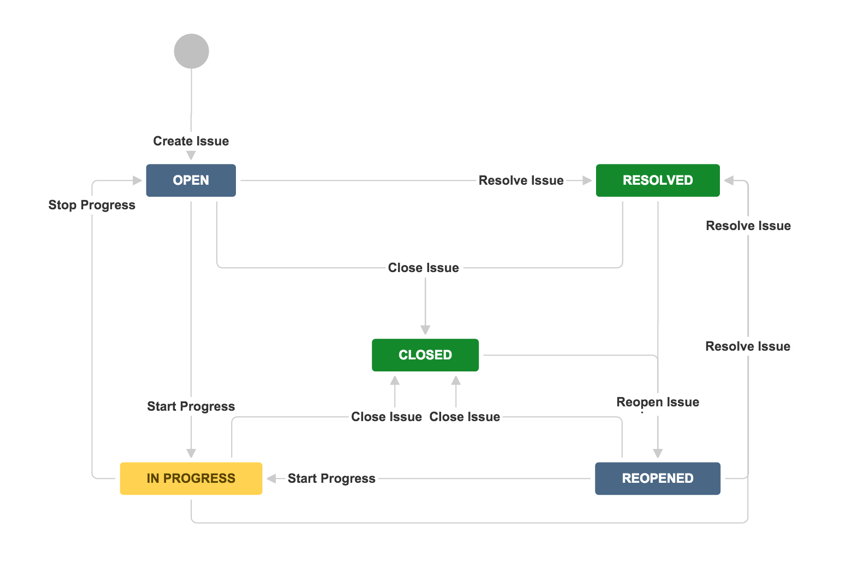
Serenity uses a simple DSL to determine what state changes it should make, based on the current JIRA state and the test outcome. Serenity considers the overall test result for all of the tests related to an issue, so if 4 tests pass, and one test fails, the overall result will be a failure.
The default configuration looks like this:
when 'Open', {
    'success' should: 'Resolve Issue'
}

when 'Reopened', {
    'success' should: 'Resolve Issue'
}

when 'Resolved', {
    'failure' should: 'Reopen Issue'
}

when 'In Progress', {
    'success' should: ['Stop Progress','Resolve Issue']
}

when 'Closed', {
    'failure' should: 'Reopen Issue'
}
If you want Serenity to update your JIRA card statuses, you will need to activate this feature by setting the serenity.jira.workflow.active flag to true.
You can even configure your own workflow. Just create a new file (say my-workflow.groovy) using the format shown above and place it somewhere on your classpath (for example, in src/test/resources). Then set the serenity.jira.workflow to point to this file, e.g.
serenity.jira.workflow.active=true
serenity.jira.workflow=my-workflow.groovy
Conclusion
This is all you need to get started with Serenity/JIRA integration. Serenity JIRA integration goes from basic links to JIRA cards, to adding comments describing the most recent test results, right through to being able to update your card statuses based on the test outcomes.